
The following instructions describe how to configure a Xerox multifunction printer to print through Adobe Acrobat on macOS.
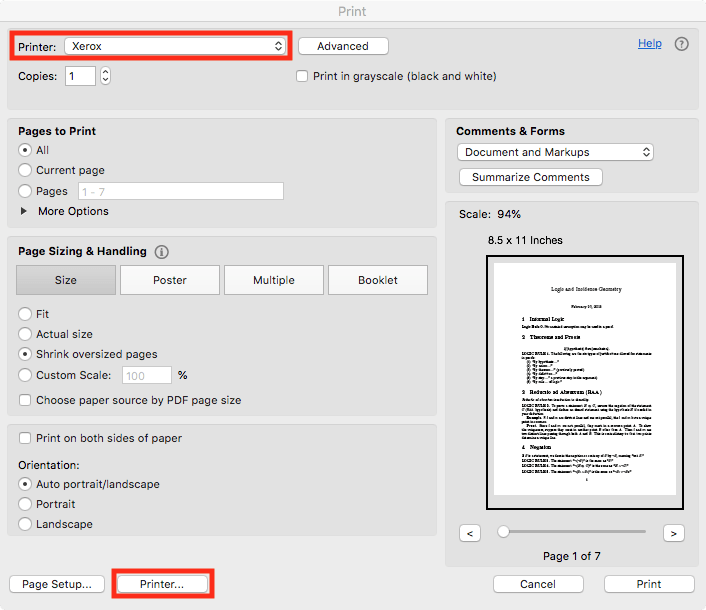
1) Make sure the Xerox printer driver is installed, then open Adobe Acrobat and choose File -> Print from the menu.
2) On the print configuration page within Adobe Acrobat click the Printer button.
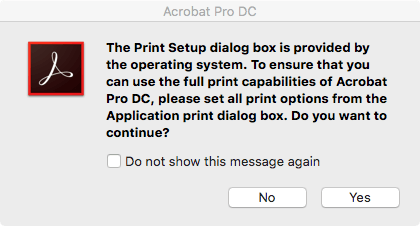
3) If you see a window with the following message, click Yes. You may also choose to click the Do not show this message again option.
4) Select Xerox Features from the menu, then choose On for Xerox Black and White.
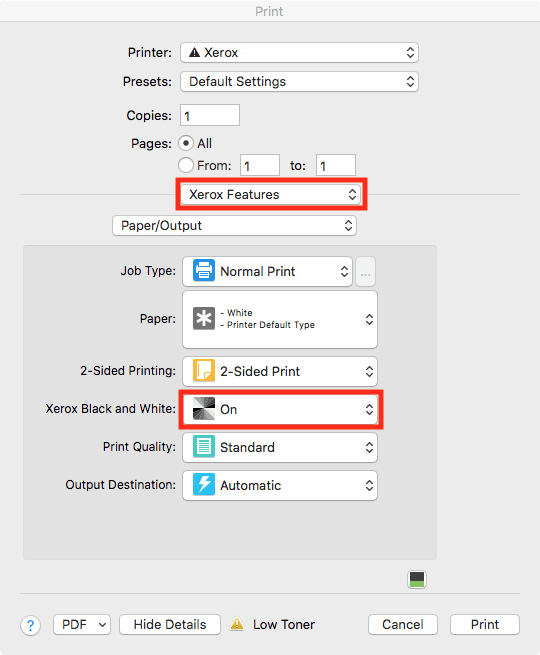
5) With Xerox Features selected, select Advanced from the menu. Set the Job Identification option to Disable Job ID, then click the Accounting… button.

6) Set the Accounting Prompt option to Always Prompt. You may optionally enter your four-digit print code in the Default User ID field. The code you enter will be the default print code, but you will always be prompted with these settings, so you may enter any print code when the print job window appears. Click the OK button.

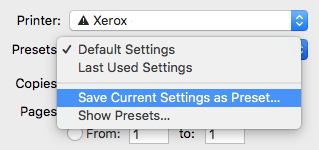
7) Save your print settings as a preset by choosing Save Current Settings as Preset… from the Presets option.
8) Name your preset whatever you like, then click OK. Your print settings should now be saved and you should be able to print PDF files through Adobe Acrobat.
