
This document describes the steps for adding a network drive to your computer using Windows 10, or newer. This will allow you to map a shared network drive to a drive letter on your computer, for more convenient access. Please note that if you are off campus, you will need to use the UO VPN (Cisco AnyConnect Secure Mobility Client). If you have never used the VPN connection before, you can find online instructions for configuring and using it here.
1) To map a network drive in Windows 10, open File Explorer from the taskbar or the Start menu, or press the Windows logo key + E.
2) In the left column of the newly opened Explorer window, click This PC.
![]()
3) At the top of the Explorer window, click Computer, then click the Map network drive icon.
![]()
If you are using a UO-owned computer and you logged into it using your Duck ID and password please refer to step 4 below. If you are using a personally-owned computer, please refer to step 5 below.
4) Do the following if you are using a UO-owned computer and you logged into it using your Duck ID and password.
- Choose an available, unused Drive letter.
- In the Folder: field, type the path to the file share, or Browse… to it. The path to the network share must be accessible using your Duck ID and password credentials.
- Check the Reconnect at sign-in checkbox.
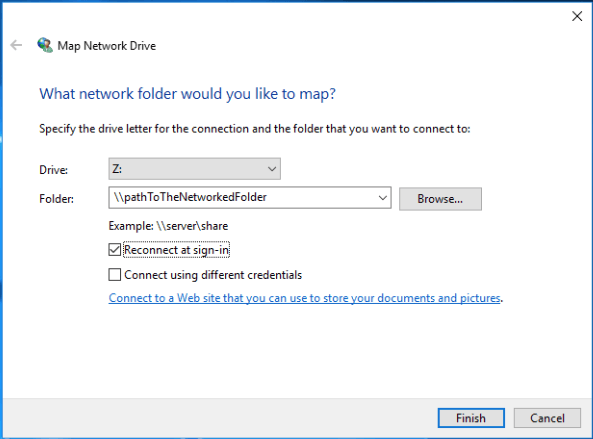
The \\pathToTheNetworkedFolder for most U of O College of Education users who need to connect to the COE Share is:
\\files\coe-cc-share\coe
Note: If you are connecting to the COE Share from a personal, non university-owned computer, you should use the following file path:
\\files.uoregon.edu\coe-cc-share\coe
After entering the share path click the Finish button. Your network share should appear as a listed drive in This PC, in any Windows Explorer window, and you do not need to complete step 5.
5) Complete the following if you are using a personally-owned computer.
- Choose an available, unused Drive letter.
- In the Folder: field, type the path to the file share, or Browse… to it. The path to the network share must be accessible using your Duck ID and password credentials.
- Check the Reconnect at sign-in checkbox.
- Check the Connect using different credentials checkbox.
- Click the Finish button.

An Enter network credentials window will appear. In the user name field, you will need to prefix your Duck ID using ad\. Note that in the window below, if the user’s duck ID was someDuckID, the user name field would begin with ad\, followed by the Duck ID, so ad\someDuckID would be entered for the user name, and you would substitute your actual Duck ID for someDuckID.
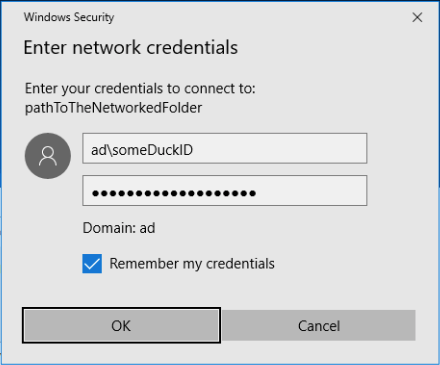
6) Click the OK button.
If authentication was successful, the network location should appear in Windows Explorer windows, and will be available whenever you are logged in on your computer.
Please note that if you are off campus, you will need to connect to the network share using the UO VPN. For connection instructions for the VPN, please refer to the “VPN Access with Cisco AnyConnect” online document here.