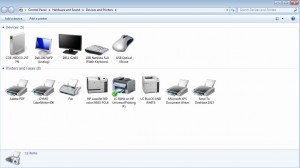
Go to the Start menu, and choose Devices and Printers.
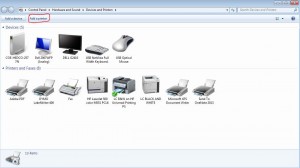
Toward the top left of the dialogue that appears select Add A Printer.
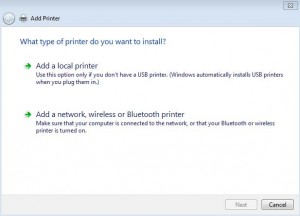
Select Add a Local Printer. NOTE: This is the counter intuitive part. Even though the printer is indeed a networked printer, you must add it as a LOCAL printer.
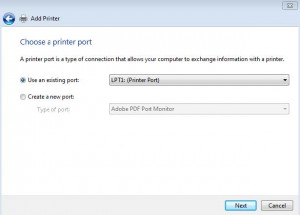
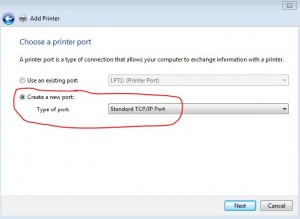
Unless you have had this printer installed on your computer previously, in the “Choose a printer port” dialogue, select Create a New Port. In the unlikely event this printer was previously installed on your computer, you can look in the list under the “Use an existing port” selection. If the port exists, it will be the same as the IP address or machine name for the printer.
Once you have selected Create a New Port, select the type of port, which will be a Standard TCP/IP Port, then click Next.
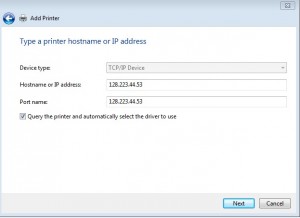
The “TYPE A PRINTER HOSTNAME OR IP ADDRESS” dialogue will appear. In the HOSTNAME OR IP ADDRESS field enter the printers IP address you want to install. The IP address will be in the format of: 128.223.xxx.xxx and is usually written or on a sticker attached to the printer itself. If it is not, you may need to print a “Printer Configuration Page” to get that information or contact the COE IT Department at: coe-support@ithelp.uoregon.edu
Be sure the box is checked in front of the QUERY THE PRINTER AND AUTOMATICALLY SELECT THE DRIVER TO USE, then select NEXT.
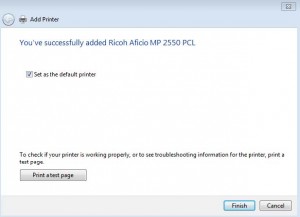
If the printer installs you just need to select FINISH.
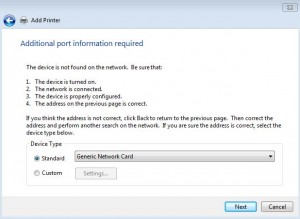
If you get a dialogue stating ADDITIONAL PORT INFORMATION REQUIRED, the printer is probably not connected to the network. It will ask you for a DEVICE TYPE, Standard or Custom. Leave the choice as STANDARD, GENERIC NETWORK CARD, and select NEXT.
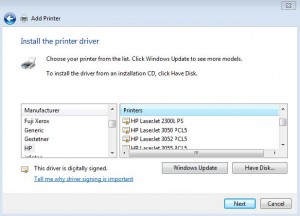
If your computer was not able to locate a driver for the printer, or if you got the error above asking for additional port information, the next dialogue will ask you to INSTALL THE PRINT DRIVER. From the left side of the table, select the MANUFACTURER of the printer. From the right side of the table select the PRINTER MODEL. If the printer you are trying to install is available in the INSTALL THE PRINT DRIVER dialogue, select it and say NEXT, then FINISH.
If the printer you want to install is not available in the dialogue, you will have to go to the printer manufacturer’s web site and download the correct driver version for the printer and your computer’s operating system. Be sure to download the driver from the printer manufacturer’s site, not a 2nd or 3rd party site. Choosing a 2nd or 3rd party site will very likely include unwanted and potentially malicious software in the download.
Download and unzip (if necessary) and install the print driver onto your computer following the software’s instructions. Be sure to DE-SELECT any little add ons that they might ask you to install such as browser tool bars etc. Pay attention to where the driver installs.
NOTE: Sometimes the Xerox driver install will try to install the printer automatically. Don’t worry about that, just let it try. I may say installation was successful, but it will not be. If you see that it added the printer to your list, just delete it (highlight and press the “ – “ at the bottom left of the list) and re-install it manually as per these instructions.
Go back to the Install the Printer Driver dialogue and this time select HAVE DISK. BROWSE to where the print driver installed. It is often a .inf file you are looking for. Select it and click OK.
The printer will install. Select Finish.
Most of the smaller, standalone printers will not require a code to print. Depending on departmental policy you may be asked to report how many pages you print to these printers and report this number to your business manager or other appointed person.
As before, remember that most Multi-Function Printers are going to require a departmental accounting code to print. This accounting code is given to you by your departments Business manager and is the same code you use for making copies on the machine.
The Canon Printers will require you to enter this code each time you print. This code is the same code you use to make copies. Just enter the code in the USER ID Field. Do not enter anything in the PASSWORD field.
The Xerox Printers requires the code to be entered. Once set it will prompt you for the code but once it is entered it will remain until you need to change it. For persons who need to use multiple accounting codes, you will need to manually change this setting each time before printing to a new code.

