
OpenShot is a free, cross-platform video editor that is a solid choice for basic editing and effects. A common need for student teachers submitting classroom video for edTPA requirements is to blur or obscure one or more faces in a video to conceal the identify of students in a classroom. This document explains the overall usage of OpenShot, as well as the basic steps for creating a blur-like effect for specific areas of a video.
First, install OpenShot by downloading it from this link: https://www.openshot.org/. Once it is installed, gather your video project assets and put them into a single folder on your computer. You will be creating a project file that organizes and links the individual files you need for your video. For this example we will only need two assets: a video clip, and a graphic for the blur effect.
A circular shape is well-suited for obscuring a single face, and a box shape can be easily scaled to obscure a rectangular area in a video. For this example we will use a circle shape. If you want a ready-made shape for your own use, the circle and square graphics below can be downloaded by right-clicking and choosing Save Image As…, or by dragging the graphic from your web browser’s window to the desktop of your computer, if supported.


Near the upper-left corner of the OpenShot interface is the area where project files are added.

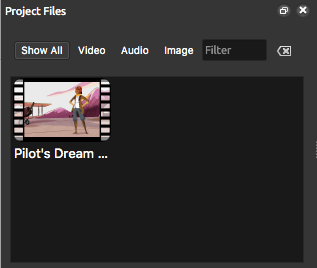
1.) Drag the video clip from your computer into the Project Files area of the OpenShot interface. Alternatively, you may import your video clip through File -> Import Files…, then navigate and open the video you want to import.
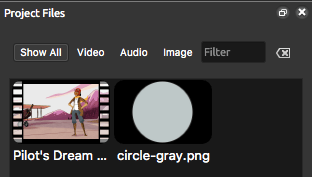
2) Drag the shape graphic you downloaded from the shape images above, or import your own graphic.
With both assets in your project you should see thumbnail images in the Project Files window.
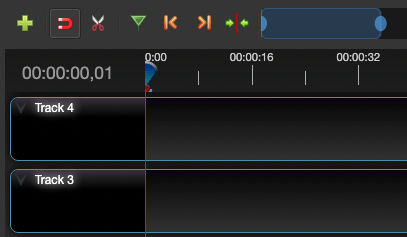
Your project window includes a Timeline area where multiple assets can be arranged in time across virtual tracks. Tracks in the project timeline will be empty by default.
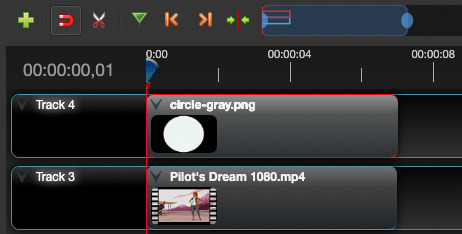
Tracks work like layers and are identified by a track number. OpenShot renders the highest numbered track last, so images or content on Track 4 will appear superimposed over the content of Track 3. Track 3 content appears on top of Track 2, and so on. We want the circle shape to cover up part of the video, so we will drag it to Track 4, and we will drag the video to Track 3.
The play head (shown below) controls where in time you are viewing your project. The red line extending downward indicates the exact frame in time that is being viewed. To change the position of the play head drag it left or right. Before proceeding, however, make sure the playhead is at the zero position in the timeline, as shown below.
![]()
3) Drag the circle graphic into Track 4 and drag your video clip into Track 3. Align the tracks horizontally and make sure the circle shape extends across the portion of the timeline where it is needed. This can be accomplished by clicking and dragging inside the region of the clip itself, or by click-dragging its left or right edges. In the image below, Track 4 and Track 3 are the same duration.
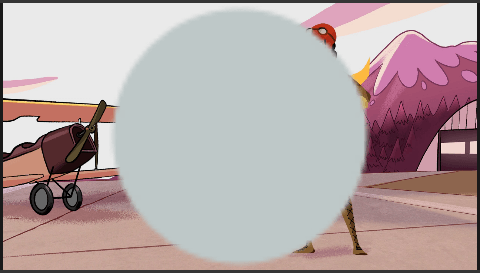
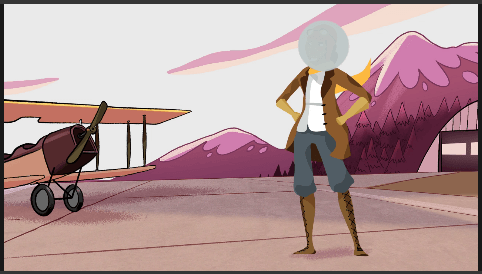
In the Preview Window area you will see the circle graphic overlaid on top of the video. Depending on how large your video is, the circle graphic may appear larger or smaller, relative to the size of the video. We will adjust the size, position, and opacity of the circle so it covers the desired area of the video. Before changing the track properties, however, it is important to understand how to make overall adjustments to the tracks themselves.
Adjusting the Timeline
Scaling the View – The view scale widget allows you to view the timeline with more or less magnification. In the image below, the lighter blue ovals that appear at the beginning and end of the widget can be dragged left or right to zoom the timeline in or out to see finer or coarser time detail. The thin red lines represent the timespan of the selected video clip, relative to the overall zoom view. The blue oval on the right, for example, can be dragged left to zoom in the timeline view, or dragged right to zoom the timeline view out. You can also click and hold the lightly shaded blue area of the widget to move the timespan left or right in the overall timeline.

Moving Tracks – Assets in each track can be moved by clicking inside the bounding rectangular area of the asset in a track, then holding the mouse button down while dragging left or right. Click-dragging up or down will move the selected contents from one track to another. You can see that all or part of a track has been selected when it appears with thin red lines on its left and right edges.
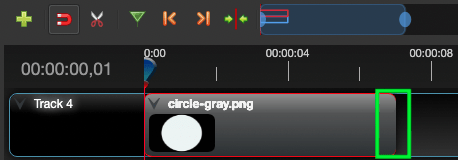
Changing Track Duration – You can shorten the length of a track by click-dragging its left or right edge. The area to click for adjusting the duration of a clip from its right edge is shown surrounded by a green box in the image below, for example.
Slicing or Splitting a Track
Slicing or splitting a track is the easiest way to cut away video that appears before or after a specific point in time. To slice a track:
- Move the play head by click-dragging it left or right to the position within the video clip’s timeline where you want the video to be sliced.
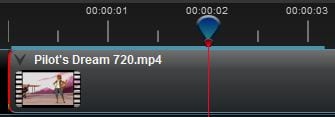
- Right-click the blue portion of the play head, which is indicated by the red arrow point in the image below.

After you right-click the play head you can Keep both Sides to insert a slice, or you can choose to remove video to the left or right of the split. The image below shows a video prior to being sliced.
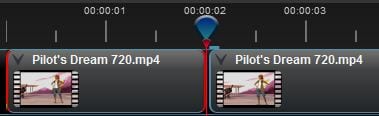
The image below shows the same video clip with a slice inserted. You can slice a video as many times as you like. To delete a sliced segment of video, left-click the segment so it is surrounded by a thin red outline, then hit the delete key on your keyboard to remove it. Note that in the split video clip below, the left portion of it is selected, as indicated by its left and right edges being red. Clicking the right side of the split track will select that portion. Hitting the delete key on the keyboard will delete whatever track, or portion of a track is selected.
Enabling the Transform Mode
The transform mode allows you to directly modify the position, size, scale, and many other properties of an image or video placed in a track. To activate the transform mode:
- Drag the play head to position within the timeline where you want to modify an image or video in a track.
- Right-click while the pointer is on top of a video or image in the timeline, then choose the Transform option.
![]()
Note: Changes made to an image or video in the timeline are automatically keyframed (i.e., blended across changes in time), so it is important to first position the play head at the point in time where you want to begin transforming the image or video. When you move the play head, then transform the video, the computer will adjust the changes to position, size, and scale at that point in time, so the transformation changes will be animated if you make changes in more than one point in time. If you want an image to remain unchanged throughout the timeline, first drag the play head to the beginning of the timeline, or drag it to the first frame where the asset appears, then apply the transform.
The animated image below represents a simple gray box that appears with small blue boxes around its perimeter, and a small blue circle in the middle when the transform mode for that image is active. In this example the blue boxes and circle can be click-dragged to change the position, size, or scale of the gray box image. Any image or video can be transformed within a track.
![]()
Changing Track Properties
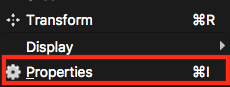
If you need to change more than the image’s position, size, or scale you will need to edit the track’s properties. To bring up the properties for a track, right-click on the image or video you want to modify. The image below shows the area in light blue where you can right-click, for example, to bring up the Properties menu.

From the menu that appears, choose the Properties option.
You should see a panel appear on the left side of the OpenShot interface that lists various properties. These are individual properties that can be changed for a selected track. Property values can be individually adjusted by dragging the mouse within the gray oval of each property. Alternatively, you can click a property you want to change, type a value, then hit the Tab or Enter key. Fractional values can be entered by first typing a period, then the numeric value. Property values can be as large or small as you need, for example, 0.01 or 2.50.
For the effect to appear like a blur we only need to change three properties, which are described below.
The Alpha property is used to adjust the opacity of the selected track. This will make the circle graphic more or less transparent.

The Location X and Location Y properties adjust the position of content within the selected track. These properties will change the X and Y location of the circle graphic.

The Scale X and Scale Y properties adjust the size of content in the selected track. These properties will scale the horizontal and vertical size of the circle graphic which will change its X and Y scale.

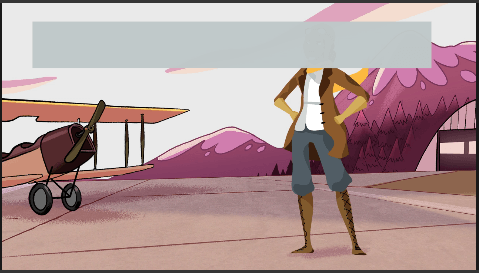
By adjusting the opacity, position, and scale of the circle graphic, a blur-like effect can be achieved to obscure any circular area of the video. You can repeat the above process, and adjust the property numbers to add as many individual “blur” areas as you need.
A rectangle shape can also be used to cover wide or tall areas of the screen.
Once you have the desired results you can export the video to save the overlay effect as a permanent part of the video.
Exporting the Video
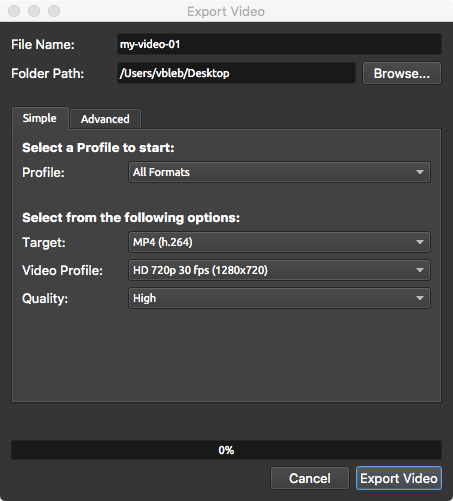
1) From the File menu, choose Export Video.
A window will appear with export options.
2) Name your video in the File Name field and choose a Folder Path by clicking the Browse… button, then a location on your computer’s drive. The Desktop is often a good choice.
You have a lot of options for exporting the video, but start with the default settings. You can always re-export the video repeatedly until you get the results you want. If your video is too large to meet edTPA upload restrictions you can take a look at the online help page, Optimizing Video File Size – https://coehelp.uoregon.edu/how-to-guides/optimizing-video-file-size/.
3) When you are ready to export the video click the Export Video button.
Depending on your video, it may take several minutes or longer to export the file. When the video has been exported, all overlays you added for blur effect should appear in the rendered file.
For more information about how to use OpenShot, refer to the official online documentation here: http://www.openshot.org/files/user-guide/index.html.
A silent video overview of the steps described above can be viewed below, provided you are logged in to Microsoft Office 365 with your UO Duck ID and password.